Mechanical Testing Methods
What is Mechanical Testing?
Mechanical testing aims to describe the behavior of different materials or components, e.g. syringes, springs, micromotors or microwires under specific loading conditions. It provides information about the relationship between forces and the deformation that results from those forces acting on the components.
There are many standardized mechanical testing methods. The most used are: tensile testing, compression testing, flexural testing, peel testing, shear testing, tear testing, fatigue testing, creep testing and friction testing.
Universal Testing Machines
A Universal Testing Machine (UTM) is a device designed to test the mechanical properties of materials, components and products. It can perform many of the aforementioned standardized mechanical testing methods. This versatility is why it is referred to as ‘universal’.
Most parts and components in different size scales can be tested in universal testing machines as long as the force/torque and deflection necessary for the respective test can be achieved in the instrument and the component can be properly fixed.
UTMs are used in many industries (e.g. automotive, aerospace, electronics, packaging and biomedical) to make sure materials and final products meet the required specifications. They usually adhere to a series of standards (ISO, ASTM …) so consistency is achieved between test results, also regarding devices from different manufacturers, and so they can be used during several stages of product development.
What can UTM tests tell us?
UTMs can help analyze different mechanical properties of materials or components. Output values are, e.g. the Young’s Modulus, yield point, flexural modulus, ultimate tensile strength, strength of an adhesive bond and many more, depending on the material or part. They are therefore used to answer questions like, e.g., “How strong and stiff is my sample?”, “How much can my sample elongate or stretch?” or “How much can my sample compress or flex before breaking?” The important data derived from the answers is used by engineers in R&D and QC. Although UTMs are commonly used for testing of large-scale, robust components, they are not limited to high force/high torque applications. While classical UTMs can achieve forces up to 5000 kN depending on the model, small-scale, soft or fragile parts can also be characterized, as long as the forces and deflections involved can be accurately measured by the transducer.
Important terms and variables: (more possible)
| Term | Symbol |
| Young’s Modulus | E |
| Shear Modulus | G |
| Poisson’s ratio | ν |
| Extensional viscosity | ηE |
| Flexural Modulus | EFlex |
| Bulk (Compression) Modulus | K |
| Engineering strain | ε |
| Engineering stress | σ |
| Normal force | FN |
| Torque | M |
| Displacement | s |
| Deflection angle | φ |
How does mechanical testing with UTMs work?
A sample of the material or a component is placed in the UTM and held by grips or special fixtures. The sample is then subjected to a force or torque (stress), and the resulting deformation or deflection (strain) is measured or vice versa. As the dimensions of the sample are known, stress-strain curves can be generated from the recorded forces and deformation, which in turn allows prediction of the materials’ or components’ behavior in operating conditions.
Mechanical testing of small components
UTMs are commonly used for high-force/high-torque applications. Conventional UTMs do not provide suitable fixtures, torque/force presets are not precise enough, and sensors lack the necessary sensitivity to deliver useful data from the measurement of very small-scale parts and components. There is an increasing need to test smaller and softer devices and materials, but for most of these applications no commercial instruments exist and researchers therefore need to rely on self-made solutions in order to characterize their components.
Combining traditional mechanical testing methods with a rheometer set-up takes advantage of the high accuracy of the optical encoder and the excellent torque resolution of its EC drive to allow measurement of even the smallest torques and deflections. Due to its lift drive and the possibility of usage of an additional lower linear drive, it is also able to measure small normal loads and displacements. In combination, this enables characterization of parts and components previously not accessible to characterization. Furthermore, additional environmental parameters such as temperature or relative humidity can be set, allowing characterization of very small parts under a wide range of environmental conditions that can be experienced during operation.
Examples of Mechanical Tests on Small Samples or Components on the UTM Micro
Testing of syringes
Syringes consist of various components that require testing to ensure proper functionality of the system, as well as ease of use for the operator and comfort for the patient.
Operating forces of prefilled syringes are determined to evaluate syringe lubrication and are measured according to the ISO 11040-4 and 7886-1 standard with high accuracy and reproducibility.
Torsional strength of microwires and fibers
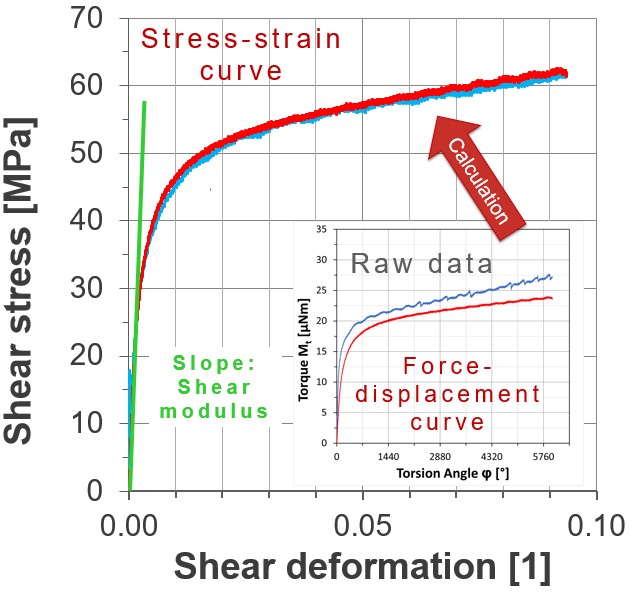
Thin wires, fibers, and parts can be tested on the UTM Micro by applying a slow rotation with the upper measuring system and measuring the resulting torque response of the sample. The choice of fixture depends on the sample diameter.
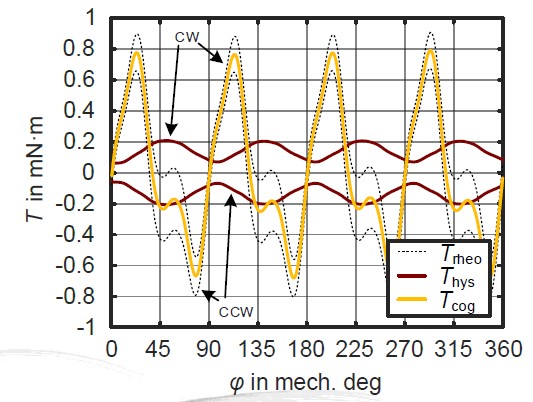
Cogging & hysteresis torque and iron losses of sub-fractional horsepower motors
Measuring cogging torque, hysteresis torque, and iron losses of permanent magnet motors can be challenging; this is especially true for very small motors.
These parameters are sensitive to manufacturing influences, which makes experimental investigations essential in addition to simulations.
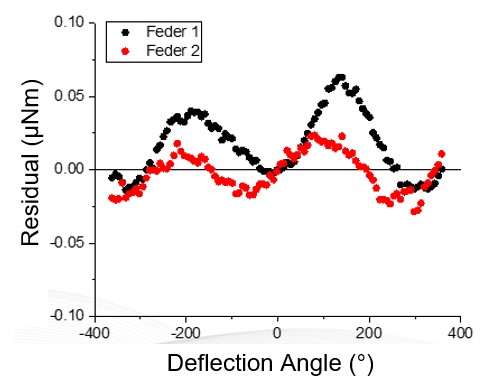
Characterization of watch parts and components
Texture profile analysis of food
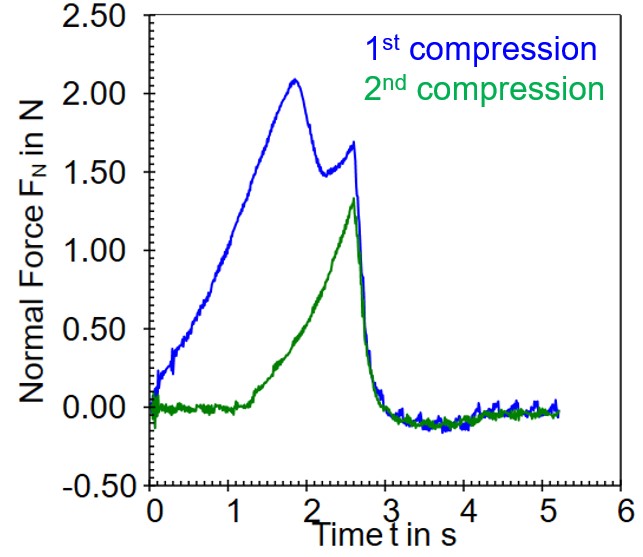
Texture profile analysis (TPA) is a test to determine textural properties of food. It is a double compression test and allows the calculation of textural properties, such as hardness, cohesiveness, springiness, chewiness and resilience, in a single measurement for a specific strain.
Read more: Texture Analysis of Meat and Cheese Analogs
Bloom strength of gelatin
Bloom strength is a measure of the gel strength of gelatin, where a higher bloom strength refers to a stiffer gel. The correct sample preparation and measurement procedure according to ISO 9665 is key for reproducible and comparable results. A half inch (12.7 mm) diameter PMMA plunger is used to compress the gelatin at a specific distance, measuring the peak force.
UTM fixtures & grips
A very wide range of materials and components can be tested with a UTM. Various fixtures and grips are needed to securely clamp the components during testing, and to prevent measurement errors. The choice of fixture depends on the test methods.
| Fixture | Test method |
| Syringe test holder (STH) | Compression |
| Parallel plate (PP) | Compression testing, torsion testing |
| Solid rectangular fixture (SRF) | Tensile testing, tear testing |
| Solid circular fixture (SCF) | Tensile testing, tear testing |
| 3-point bending (TPB) | Bend testing |
| Universal extensional fixture (UXF) | Peel testing |
| Standardized hole pattern flange to mount stages and self-made holders | |
| Special and customized fixtures (fixtures for micromotors, bearings, O-rings, springs etc.) | |

